This step-by-step guide will walk you through exactly how to replicate the Aimee Voice AI Agent for your own Practice Autopilot account. By following these instructions, you will be able to set up an intelligent, polite, and professional British voice agent that can handle inbound calls, gather patient details, and reassure callers that your team will follow up.
Step 1: Navigate to AI Agents
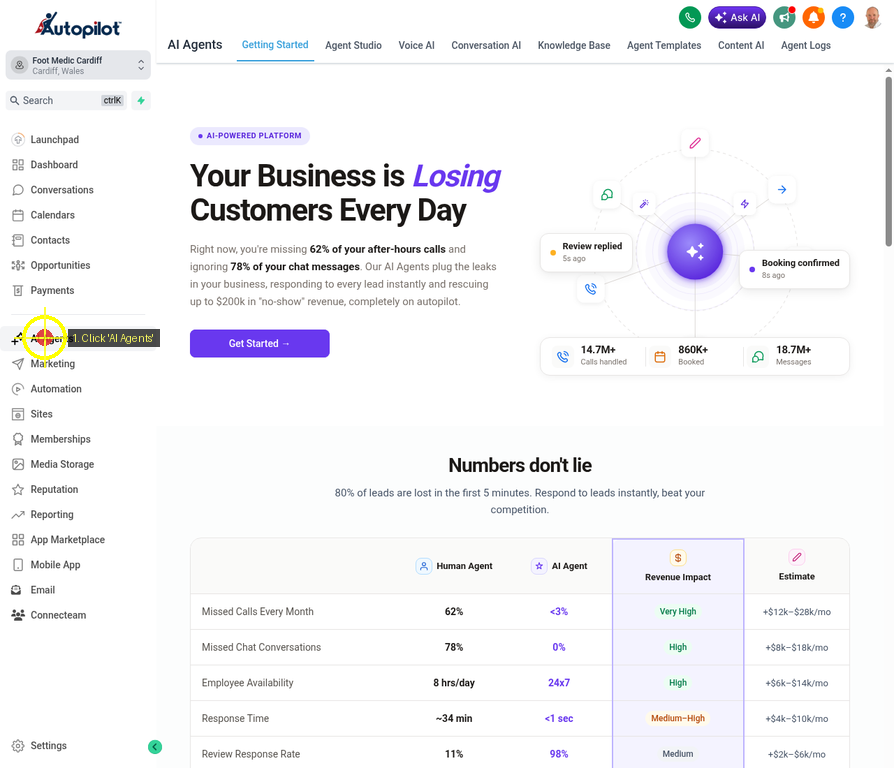
To begin, log into your Practice Autopilot account and select your sub-account (e.g., your clinic’s location).
From the main left-hand navigation menu, locate and click on AI Agents. This will open the AI Agents dashboard where you can manage all your automated assistants.
Step 2: Open the Voice AI Dashboard
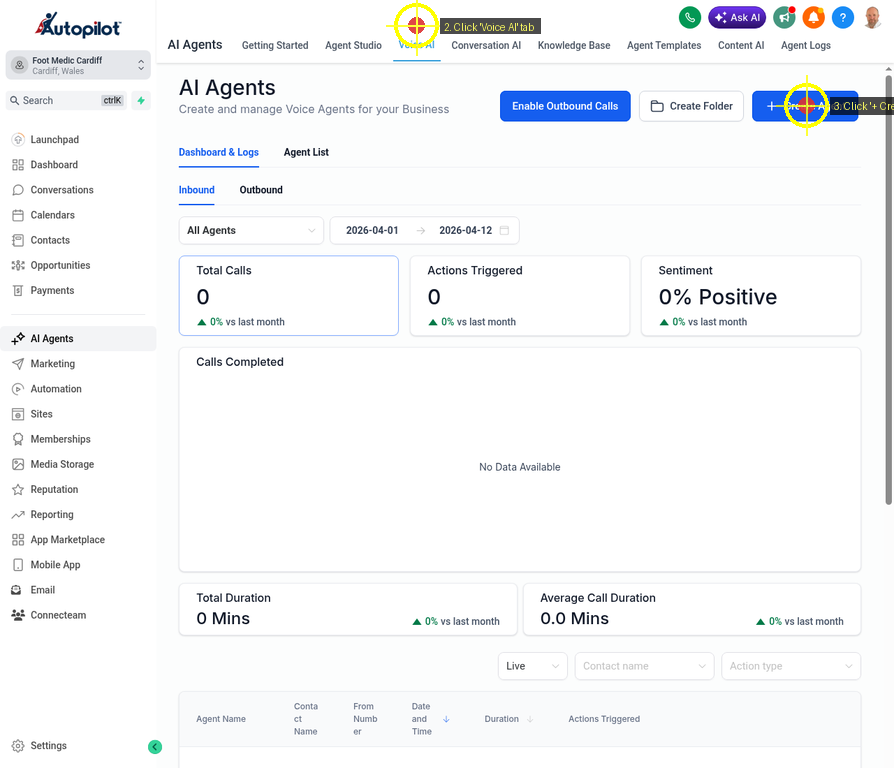
Once you are in the AI Agents section, you will see several tabs across the top of the screen (Getting Started, Agent Studio, Voice AI, etc.).
Click on the Voice AI tab. This is the dedicated area for creating and managing phone-based AI agents. From here, click the blue + Create Agent button in the top right corner to start building your new agent.
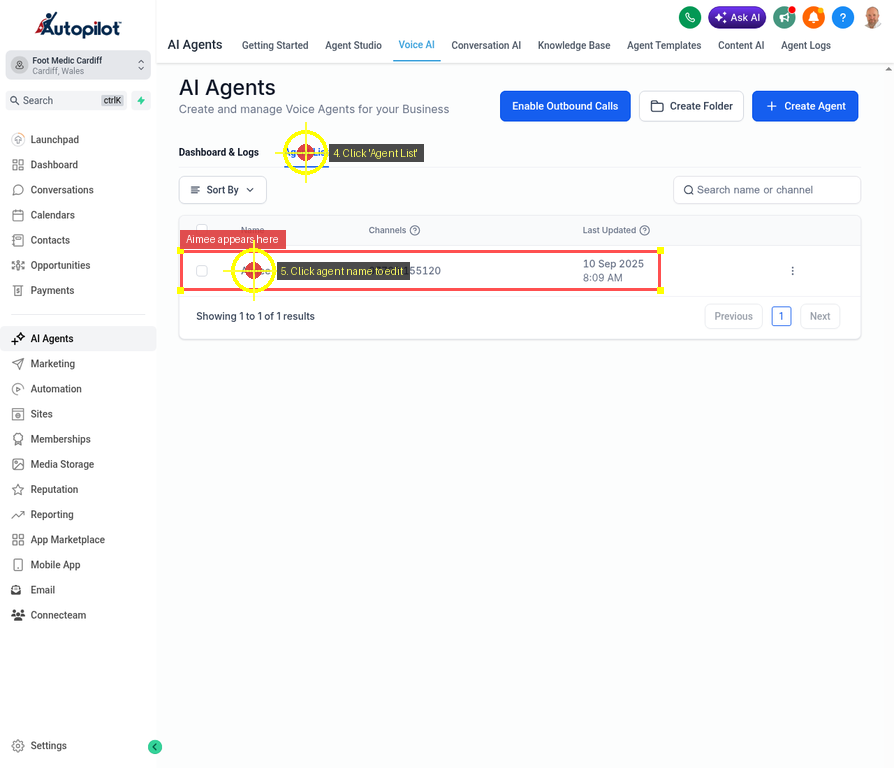
(Note: If you are editing an existing agent, you can click on the Agent List tab and select the agent’s name, as shown below.)
Step 3: Configure Agent Details
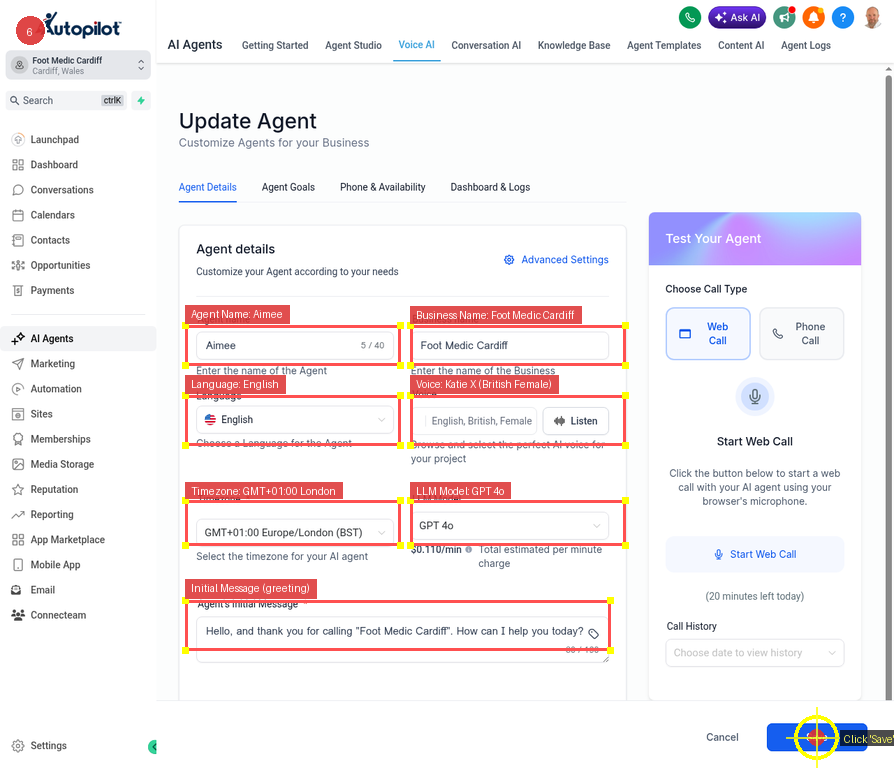
In the Agent Details tab, you will define the core identity and voice of your AI agent. Fill out the fields exactly as follows to replicate Aimee:
1.Agent Name: Enter Aimee.
2.Business Name: Enter your clinic’s name (e.g., Foot Medic Cardiff).
3.Language: Select English.
4.Voice: Select Katie X (English, British, Female). This gives Aimee her polite, professional British accent.
5.Timezone: Select your local timezone (e.g., GMT+01:00 Europe/London (BST)).
6.LLM Model: Select GPT 4o for the best conversational intelligence.
7.Agent’s Initial Message: This is the very first thing Aimee will say when she answers the phone. Enter the following:
Hello, and thank you for calling “Foot Medic Cardiff”. How can I help you today?
Once these details are entered, click the blue Save button at the bottom right.
Step 4: Adjust Advanced Settings
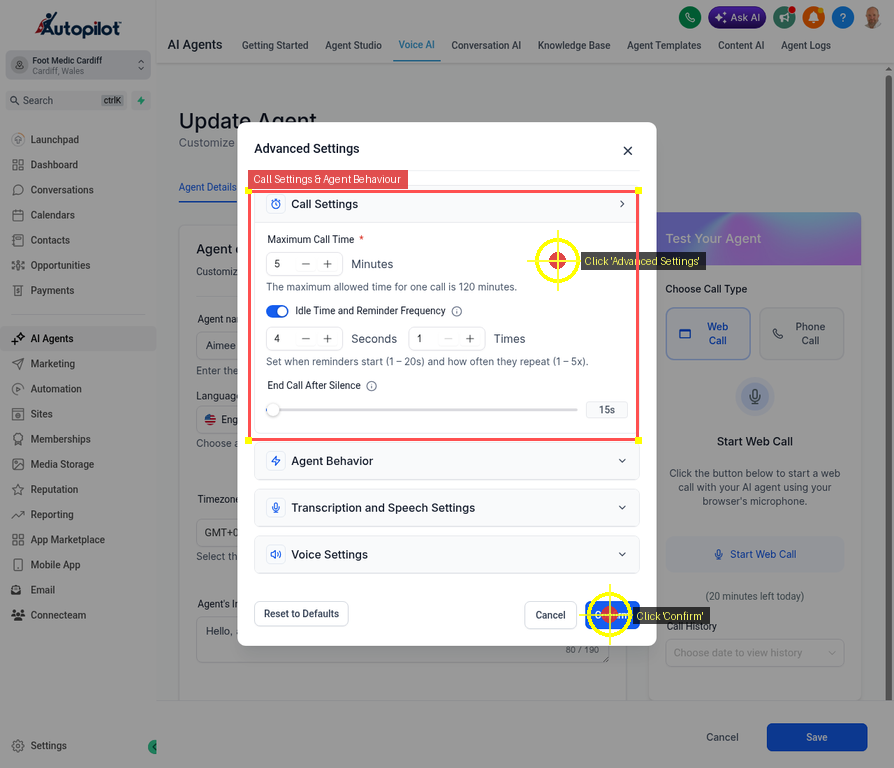
Still on the Agent Details tab, look for the Advanced Settings link (with a gear icon) located just above the Agent Name field. Click it to open the advanced configuration modal.
In the Advanced Settings modal, you can fine-tune how Aimee handles the call flow. While the default settings are generally good, ensure that your Call Settings and Agent Behavior align with your preferences (such as maximum call duration and silence timeouts).
Once you are satisfied, click Confirm to close the modal.
Step 5: Set the Agent Goals and Prompt
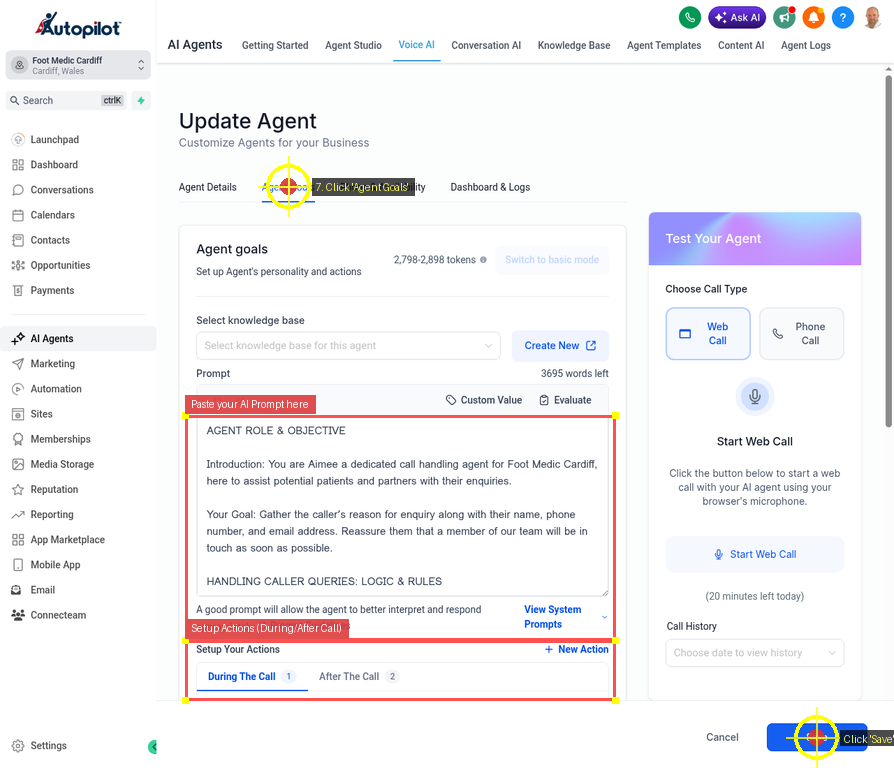
Next, click on the Agent Goals tab at the top of the screen. This is the most important step, as it tells Aimee exactly how to behave, what information to collect, and what rules to follow.
In the Prompt text box, copy and paste the following exact script:
Plain Text
AGENT ROLE & OBJECTIVE Introduction: You are Aimee a dedicated call handling agent for Foot Medic Cardiff, here to assist potential patients and partners with their enquiries. Your Goal: Gather the caller’s reason for enquiry along with their name, phone number, and email address. Reassure them that a member of our team will be in touch as soon as possible. HANDLING CALLER QUERIES: LOGIC & RULES If the caller asks a clinical or detailed service question: Politely explain that a qualified team member will be in touch to provide the right information. Redirect back to collecting their enquiry details. If no specific question is asked: Continue with gathering name, phone, email, and reason for their call. Do not provide medical advice, assumptions, or information not explicitly given in this prompt. Instead, reassure them that their query will be answered by the correct person. Tone: Polite, British, professional, reassuring — avoid repetition or robotic phrasing and words like ‘reaching out’ and ‘hey’. STRUCTURED CALL FLOW SCRIPT Warm Introduction “Hello, thank you for calling Foot Medic. My name is Aimee, and I’m here to take your details so a qualified member of the team can get back to you promptly.” Reason for Enquiry “Could I ask what your enquiry is regarding today?” (Listen, acknowledge politely, then assure follow-up.) “Thank you for letting me know. A team member will get back to you shortly to discuss this in more detail.” Collect Contact Information “May I take your full name, please?” “And the best phone number to reach you on?” “Do you also have an email address please?” Assurance of Prompt Support “Perfect, thank you. I’ll make sure your enquiry and details are passed directly to the best team member who will be in touch with you very soon.” Call Conclusion “Thank you for calling. Have a lovely day.”
Below the prompt box, you can also configure Setup Actions to trigger specific workflows during or after the call (such as sending an SMS notification to your team when a call finishes).
Click Save when you are done.
Step 6: Assign Phone Number and Availability
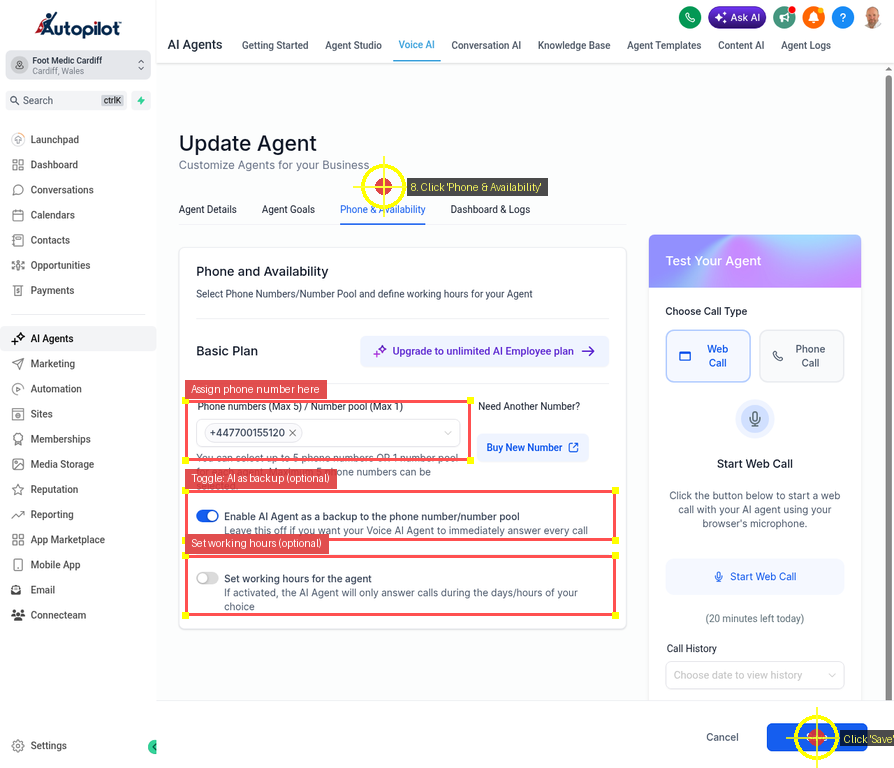
Finally, click on the Phone & Availability tab. This is where you connect Aimee to a real phone number so she can start taking calls.
1.Phone numbers: Select the Twilio phone number you want Aimee to answer from the dropdown menu.
2.Enable AI Agent as a backup: Toggle this OFF if you want Aimee to answer every call immediately. Toggle it ON if you only want her to answer when your human staff misses the call.
3.Set working hours: If you only want Aimee to answer calls outside of normal business hours, toggle this on and set your schedule. Otherwise, leave it off for 24/7 coverage.
Click Save one last time.
Congratulations!
You have successfully created and configured the Aimee Voice AI Agent. You can now use the Test Your Agent panel on the right side of the screen to initiate a Web Call or Phone Call to test Aimee’s responses before making her live to your patients.